In a practicing DevOps organization, everyone has shared responsibility for the different segments of the software lifecycle.
Developer, security, and operations teams work together and communicate early in the process instead of throwing stuff over the fence and point to each other when shortcomings arise. It becomes clear very quickly that without permissions and tools, it's hard to expect responsibility. Give your developers the freedom and non-intrusive tools to discover vulnerabilities themselves in time, run code inspection tools or builds, or whatever tool they need access to while minimizing administrative chores.
Here we look at how to allow developers to automatically trigger a Jenkins build after a Git commit.
Do you prefer a tutorial video? Watch how to create an automation rule for triggering a Jenkins build on commit!
Extending Automation for Jira with DevOps triggers
The below DevOps automation solution is based on Automation for Jira Data Center and Better DevOps Automation for Jira to automate a Jenkins build.
The free Better DevOps Automation for Jira app extends Automation for Jira with DevOps triggers that you can use in any no-code, low-code automation rule in Jira.
You can freely combine the DevOps automation triggers by Better DevOps Automation with the built-in Automation for Jira actions, and implement a wide range of custom DevOps workflows. If you are new to Better DevOps Automation, don't skip the introductory blog on this DevOps automation solution for Jira Data Center.
Trigger a Jenkins build automatically on commit
Create a DevOps automation rule for triggering a Jenkins build with a few simple steps!
Your developers can use the @build command in the commit message, and decide if they want to run a Jenkins build after the commit has been accepted. This gives them a seamless way to control CI/CD actions, without leaving context.
Steps to create a DevOps automation rule for Jenkins:
-
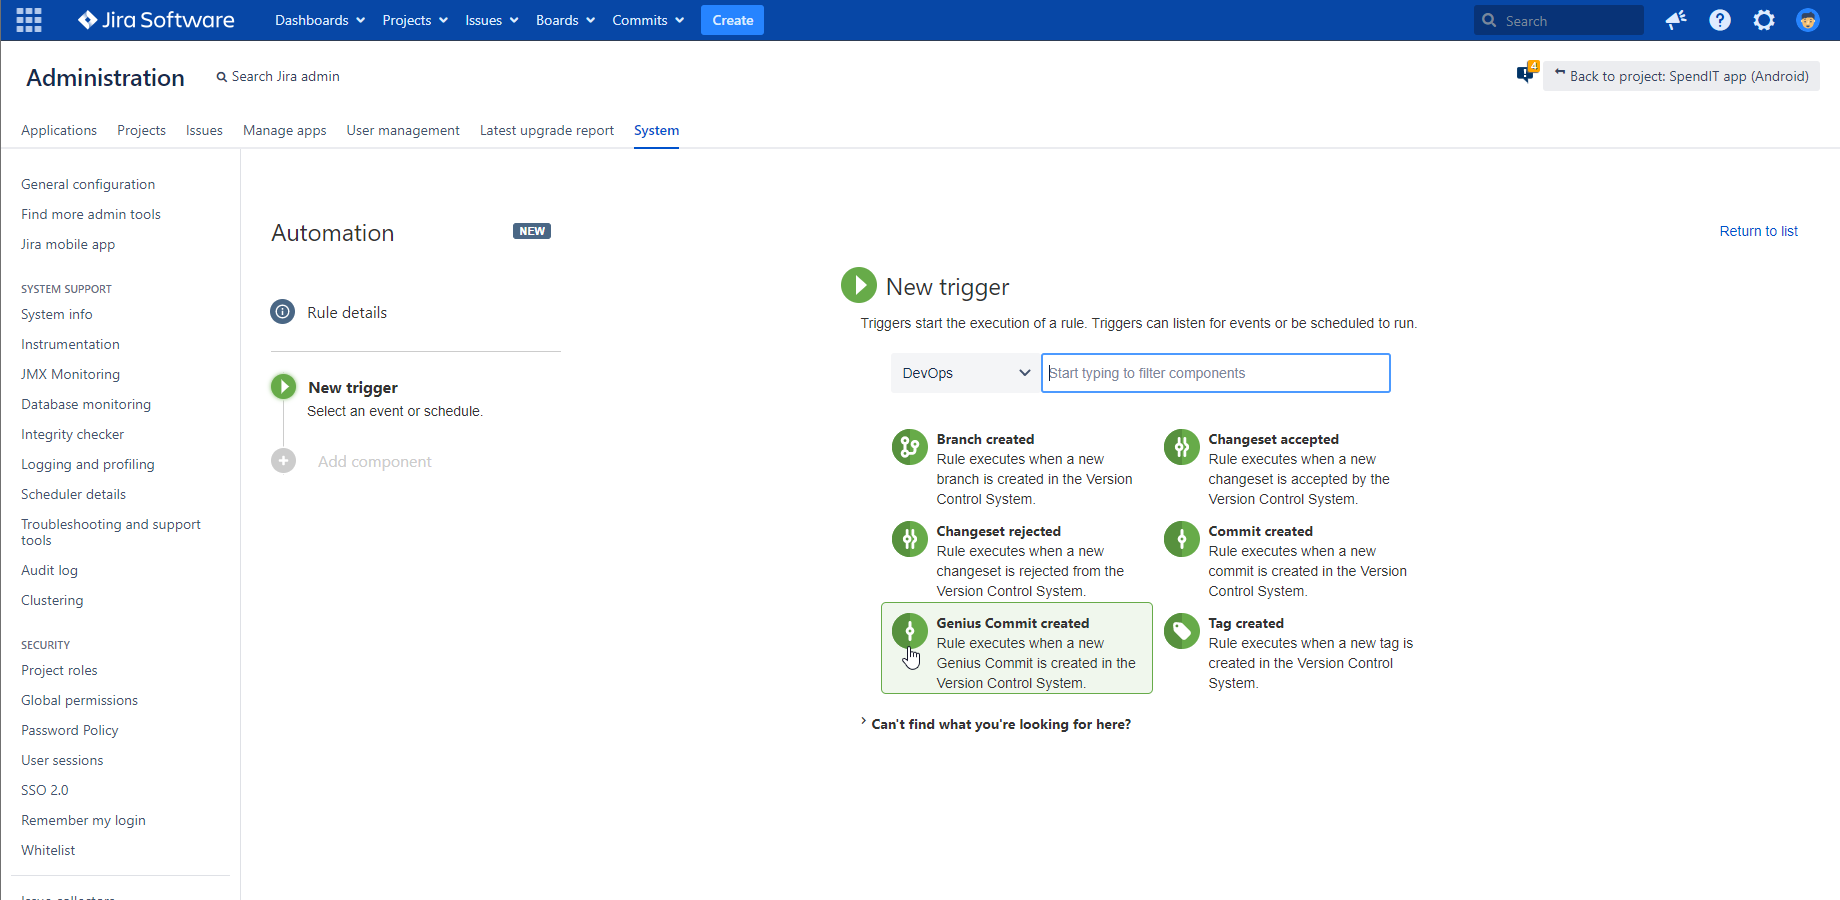
Create a new Automation for Jira rule and choose the Genius Commit created trigger from the DevOps category!
-
Choose the command "Build (@build)" from the list of commands!
-
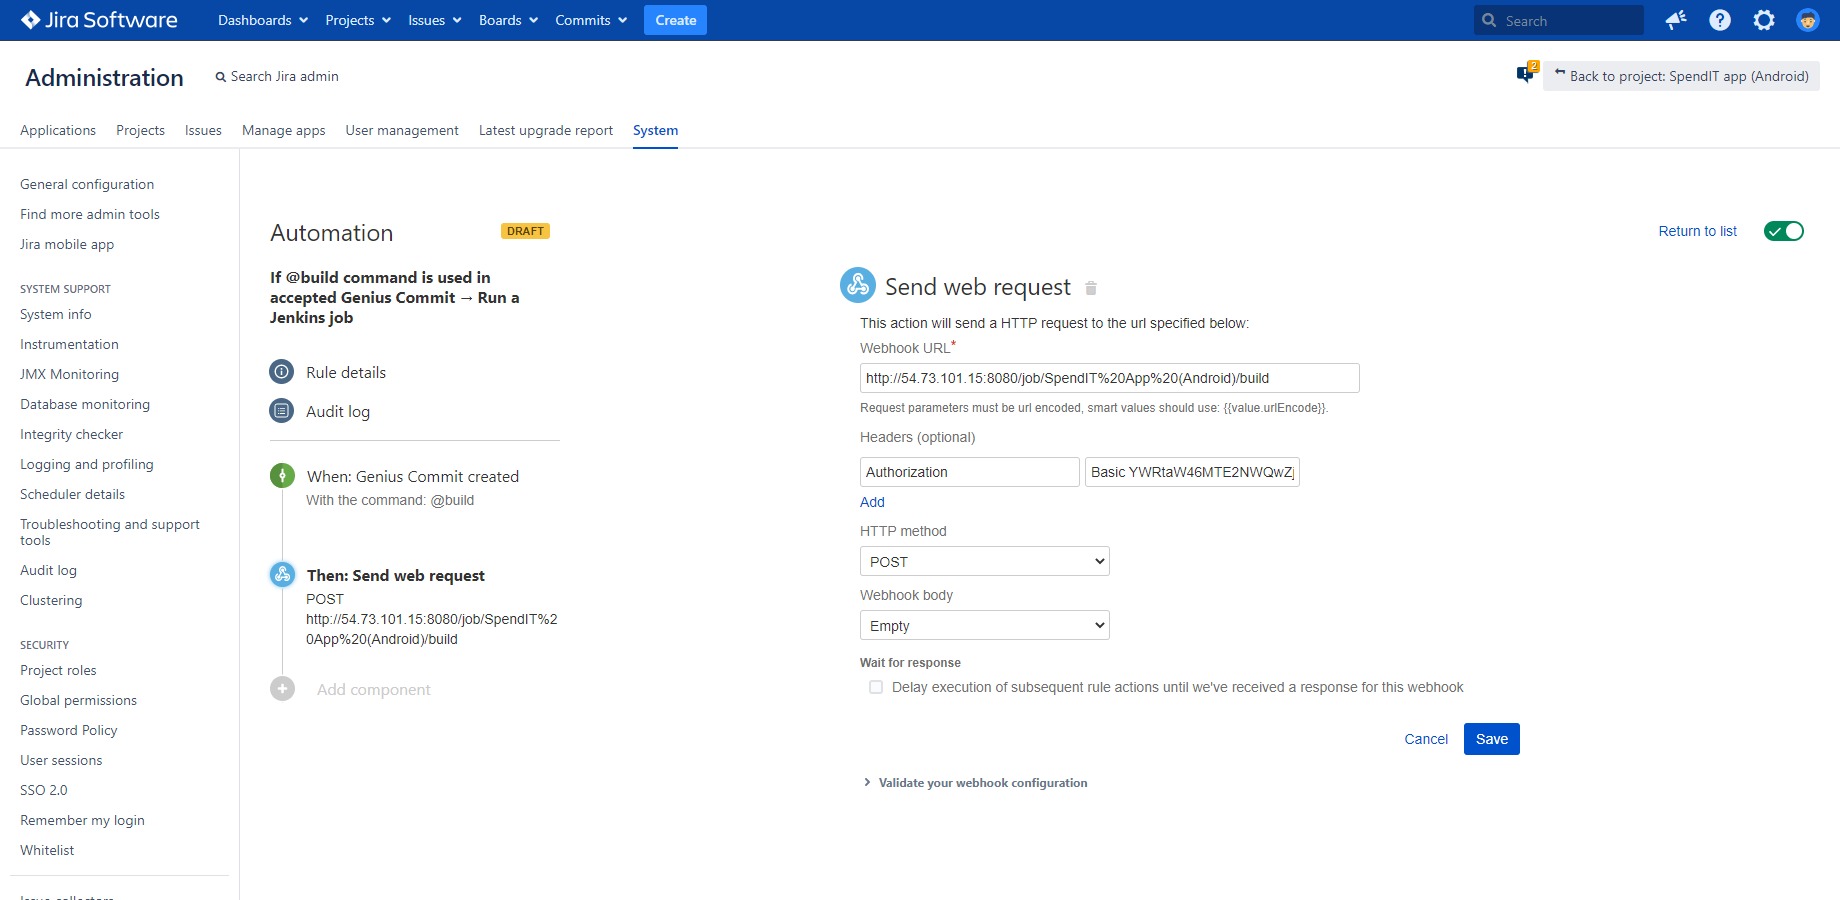
Select the Send web request automation action!
Supply your Webhook URL for Jenkins:
<YOUR_JENKINS_SERVER_BASE_URL>/job/<YOUR_JENKINS_JOB_NAME>/buildReplace the placeholders with your actual Jenkins base URL and the name of the job to be started.
-
Add a header with the name "Authorization" and with the value of the Base64 encoded Jenkins credentials! When encoding your credentials, use your Jenkins username and the Jenkins API Token as your password! (Watch the tutorial video if unsure how to create a Jenkins API Token!)
-
Leave the HTTP method selector on POST!
-
Save your automation rule and give it a name!
Ready to test this Jira Jenkins automation? Get Better DevOps Automation for Jira for free!


