
Certain service requests must be approved before being fulfilled in many internal systems. Jira Service Management can place an approval step within its issue workflow in a fairly simple way. Creating a Jira Service Management Approver Report, however, is not straightforward. Among the Jira Service Management reporting options there are no built-in reports for request approvals or approver users.

In this article, you can learn how to create a Jira Service Management Approval Report. Before we get to that, it's important to understand a few key concepts around Jira Service Management approval workflow and approvers.
How to get a Jira Service Management approvers list
Note that the Atlassian product is called Jira Service Management after a brand change, although many still search for "Jira Service Desk approvers list" when want to create a list of request approvers.
Let's see how you can create a Jira Service Management approvers list!
- First off, don't forget that you need admin rights!
- Create a Jira user group and add people who could be approvers and name it.
- Create the custom field you use for approvers.
- Edit "Context and Default values", choose "User filtering".
- Find the group you've created, add it and save.
You can find more detailed instructions here (with screenshots).
Setting up a Jira Service Management approval workflow
A slight misunderstanding needs to be clarified first. There is no "approval workflow" in Jira Service Management.
There is the Jira issue workflow that you are familiar with. Within that workflow, you can place an approval step anywhere. You can configure certain attributes of this approval stage, but it's not called a workflow, per se. You can define when approval is needed, who needs to approve and what happens with the request in case of approval or rejection. These are the options you can fine-tune, but to be clear, Atlassian does not call it a Jira Service Management approval workflow.
In the approval stage settings you can define:
- The users who need to approve (it can be a Jira user picker field or can come from Assets objects)
- Whether there are multiple approvers or just one
- Whether one approval is enough or all (or a certain number of) approvers have to sign off
- What status should the request be transitioned to after the approval stage
Jira Service Management multiple approvers
As mentioned, you can have multiple approvers added to the approval stage.
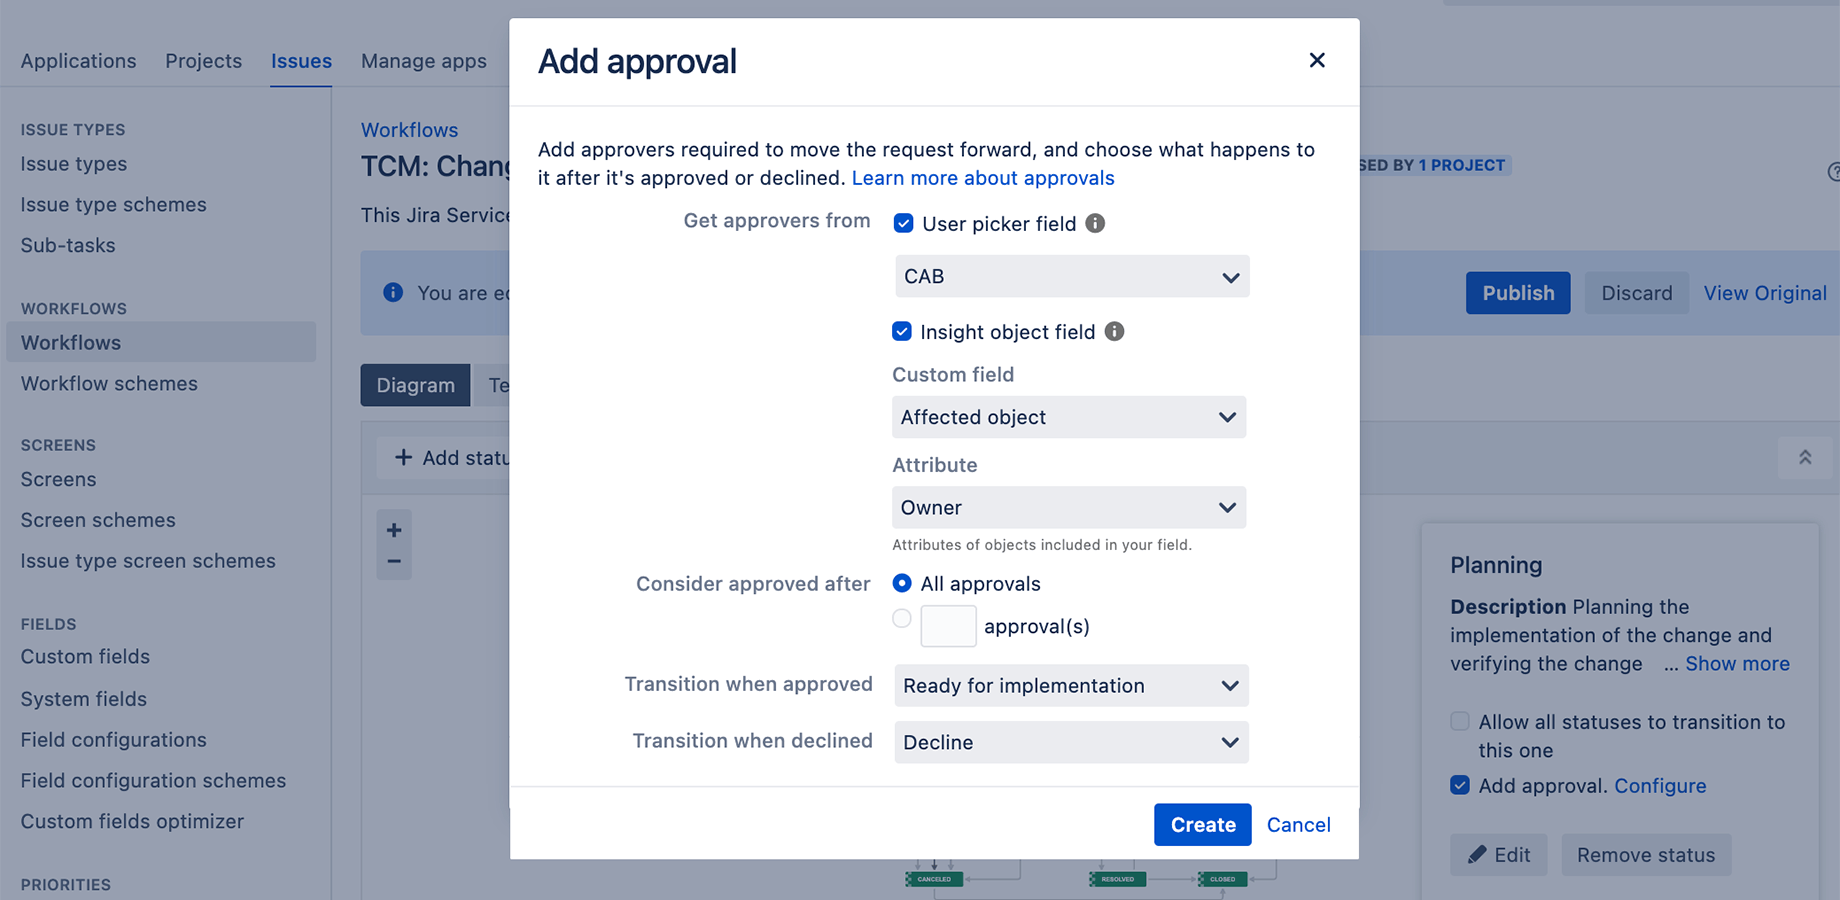
When you are adding an Approval to your workflow, choose Approvers and pay special attention to the "Consider approved after" part. Here, you can choose "All approvers" if you'd like to have all approvers added to the field.
Alternatively, you can choose to have a specific number of them to approve before it counts as approved. The input field "number of approvals" serves to define how many approvers are needed.
Creating a Jira Service Management Approver Report
The Better Excel Exporter for Jira app comes with a default report template to export the Jira Service Management Approvers field. There are also built-in pivot tables and pivot charts in this report.
You can see at a glance who approves which kind of service requests and if there is a bottleneck in the approval process. This can happen for example if too few people have the right to approve certain ticket types.
Steps to create a Jira Service Request Approver Report:
- Go to Advanced issue search in Jira Service Management.
- Collect the tickets you want to include in the Approver Report.
- Select the Better Excel Exporter icon at the top.
- Choose the "Service Request Approvers Report" export option.
The Jira Service Request Approver Report
In the exported Excel file, you find all the issues that fit your search criteria. On separate worksheets, you have a pivot table and a pivot chart for Approvers and Approver groups.
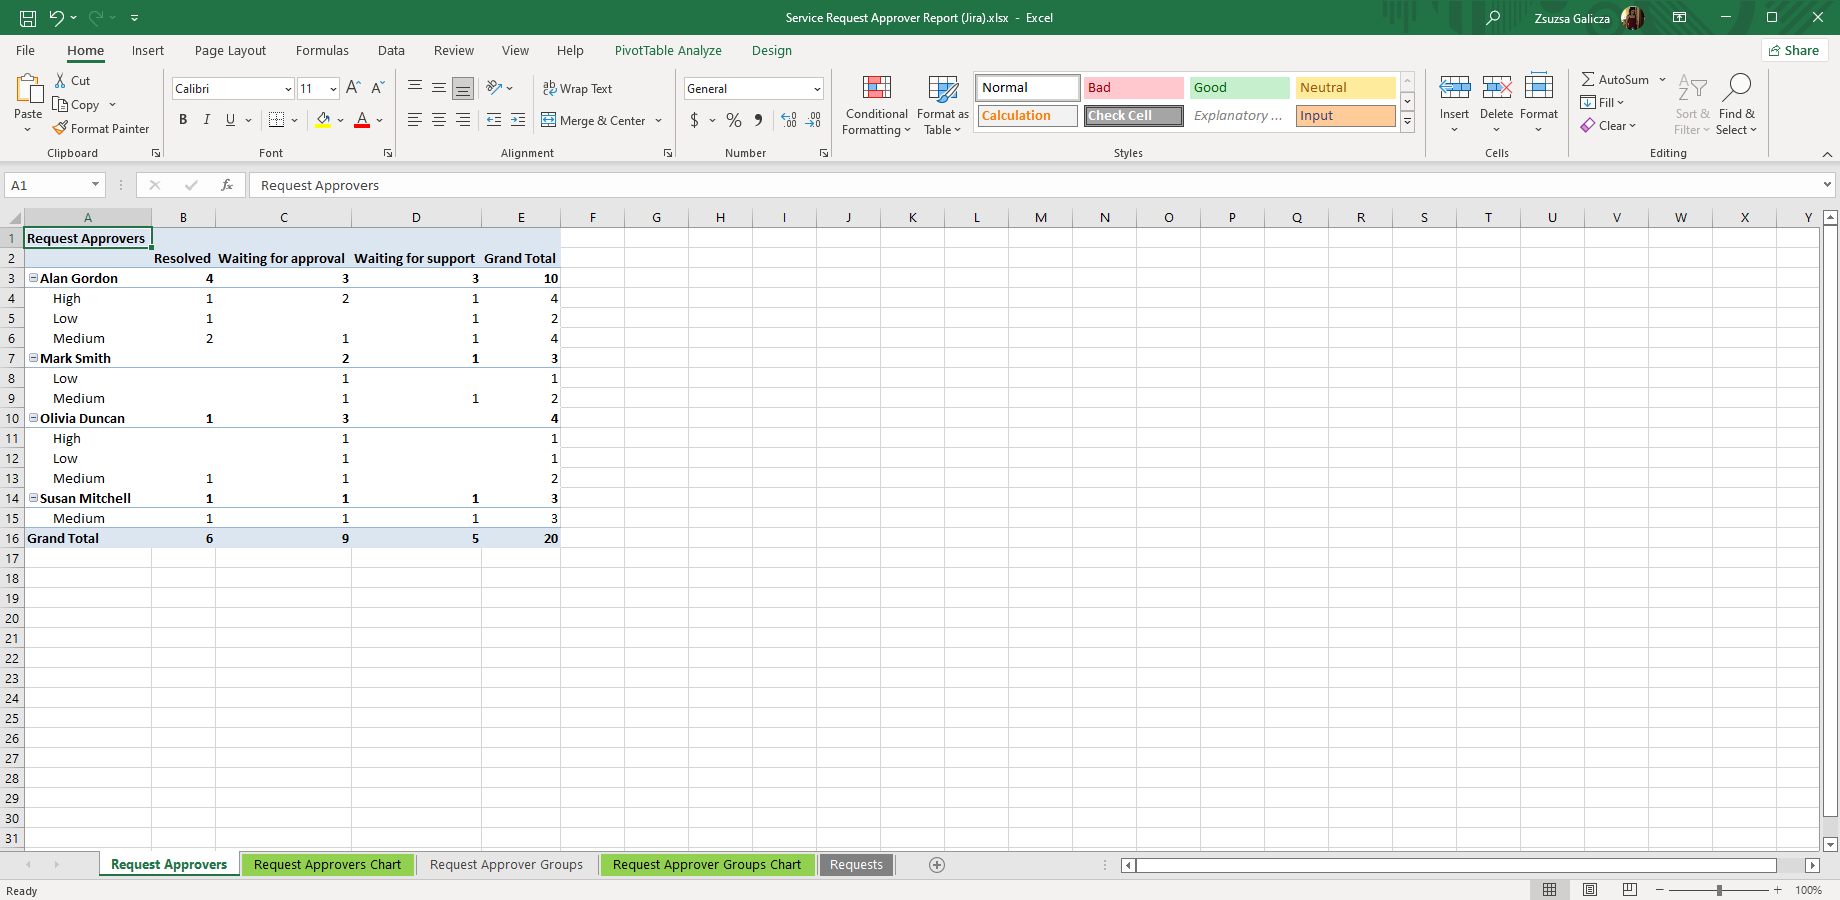
Looking at the Approver Excel report, you can understand the state of approvals, like:
- How many approvals are each team member involved in?
- What are the statuses of approvals team members are responsible for?
- What are the priorities of approvals in different statuses?
You can answer questions like:
"How many high-priority requests are waiting for Susan's approval?" or "Which manager had to approve the most requests in a certain period?"
Creating custom Approver Reports
You can freely edit and modify the exported Jira Service Request Approval Report. For example, add the "Priority" field to the pivot table to see if all the higher priority service requests are approved.
Or, add the creation dates to the table to see if approvals are happening in time. Slow approvals show which manager has a lot more on their plate than others. The report will help decide on reallocating tickets to mitigate the problem.
At the same time, you can also take something out to have a clearer view of the chart.
Get the Jira Service Management Approver Excel report template when you start a free trial of Better Excel Exporter for Jira!

