In this page
Sending a Zoom message about a new changeset
Zoom is a chat and video conferencing software known for its ease-of-use and fit for many use cases. Zoom is available in a free, limited-feature version for personal use and in a full-feature version for businesses.
This automation sends a notification message to a Zoom chat about the changeset after that has been accepted by the repository:
The message content can be freely customized, allowing you to post anything from short summaries to longer details.
Configuration
- Install the Incoming Webhook app to Zoom (developed by the Zoom team) from the Zoom App Marketplace.
- Start the Zoom client app.
- Go to the chat that you want to use to receive messages from Jira, or create a new channel under Contacts → Channels.
- Enter the following command into the chat (just type it as a message):
/inc connect Better DevOps Automation for Jira
- The Incoming Webhook app (under Apps) should display a message with the connection details. You will need the Endpoint and Verification Token later.
- Login to Jira as admin, go to Administration → System → Automation rules.
- Click Create rule.
- Select the trigger Changeset accepted (from the DevOps category).
- Click Save.
- Click Add component and select New condition.
- Select the condition Advanced compare condition.
- Enter {{devops.changeset.commits.size}} to the First value field.
- Choose the does not equal option from the Condition dropdown.
- Enter "0" to the Second value field.
- Click Save.
- Click New action.
- Select the action Send web request.
-
Enter the Webhook URL as:
<YOUR_ZOOM_CHANNEL_ENDPOINT>?format=full
Replace <YOUR_ZOOM_CHANNEL_ENDPOINT> with the actual value at Endpoint. Don't forget to append ?format=full to the URL! - Add a header with the name "Authorization" and with the value of the Verification Token.
- Add a second header with the name "Content-Type" and with the value of "application/json".
- Choose POST as HTTP method.
- Choose Custom data as Webhook body.
-
Enter the following JSON string as data:
{ "is_markdown_support": true, "content": { "head": { "text": "[DEVOPS] {{devops.changeset.commits.size}} new commit{{#devops.changeset.commits}}{{^first}}{{#last}}s{{/}}{{/}}{{/}}{{^devops.changeset.commits}}s{{/}} in {{devops.changeset.repositoryId.jsonEncode}}" }, "body": [{ "type": "message", "text": "{{#issues.size}}*{{issues.size}} issue{{#issues}}{{^first}}{{#last}}s{{/}}{{/}}{{/}}{{^issues}}s{{/}}* linked:{{/}}{{^issues.size}}No issues linked.{{/}}{{#issues}}\n<{{url}}|{{key}}> {{summary.jsonEncode}}{{/}}{{#devops.changeset.commits}}\n\n—————\n\nCommit: *#{{id}}* · Branch: *{{branch.jsonEncode}}* · Author: *{{author.jsonEncode}}*\n\n>{{message.replace("\n","\n>").jsonEncode}}\n\n*{{files.size}} file{{#files}}{{^first}}{{#last}}s{{/}}{{/}}{{/}}{{^files}}s{{/}}* changed:{{#files}}\n`{{action.label}}` {{path.jsonEncode}}{{/}}{{/}}" }] } }Notes:- You can use the Zoom markdown syntax here.
- Those smart values that can contain JSON-unsafe characters should be JSON-encoded with .jsonEncode.
-
Validate your settings in the Validate your webhook configuration section below.
It will send a notification if the configuration is valid.
Tip: if the URL contains smart values (variables), replace those with actual values (constants) for the time of the validation, then revert to the smart values after the configuration was successfully validated.
-
Enter the Webhook URL as:
- Click Save.
- Name your automation rule intuitively, and click Turn it on.
Read more about the Chatbot configuration.
Usage
- Create a commit in your repository with this message:
Implement the FOO-1 feature.
- Then another with this:
Fix the FOO-2 and FOO-3 bugs.
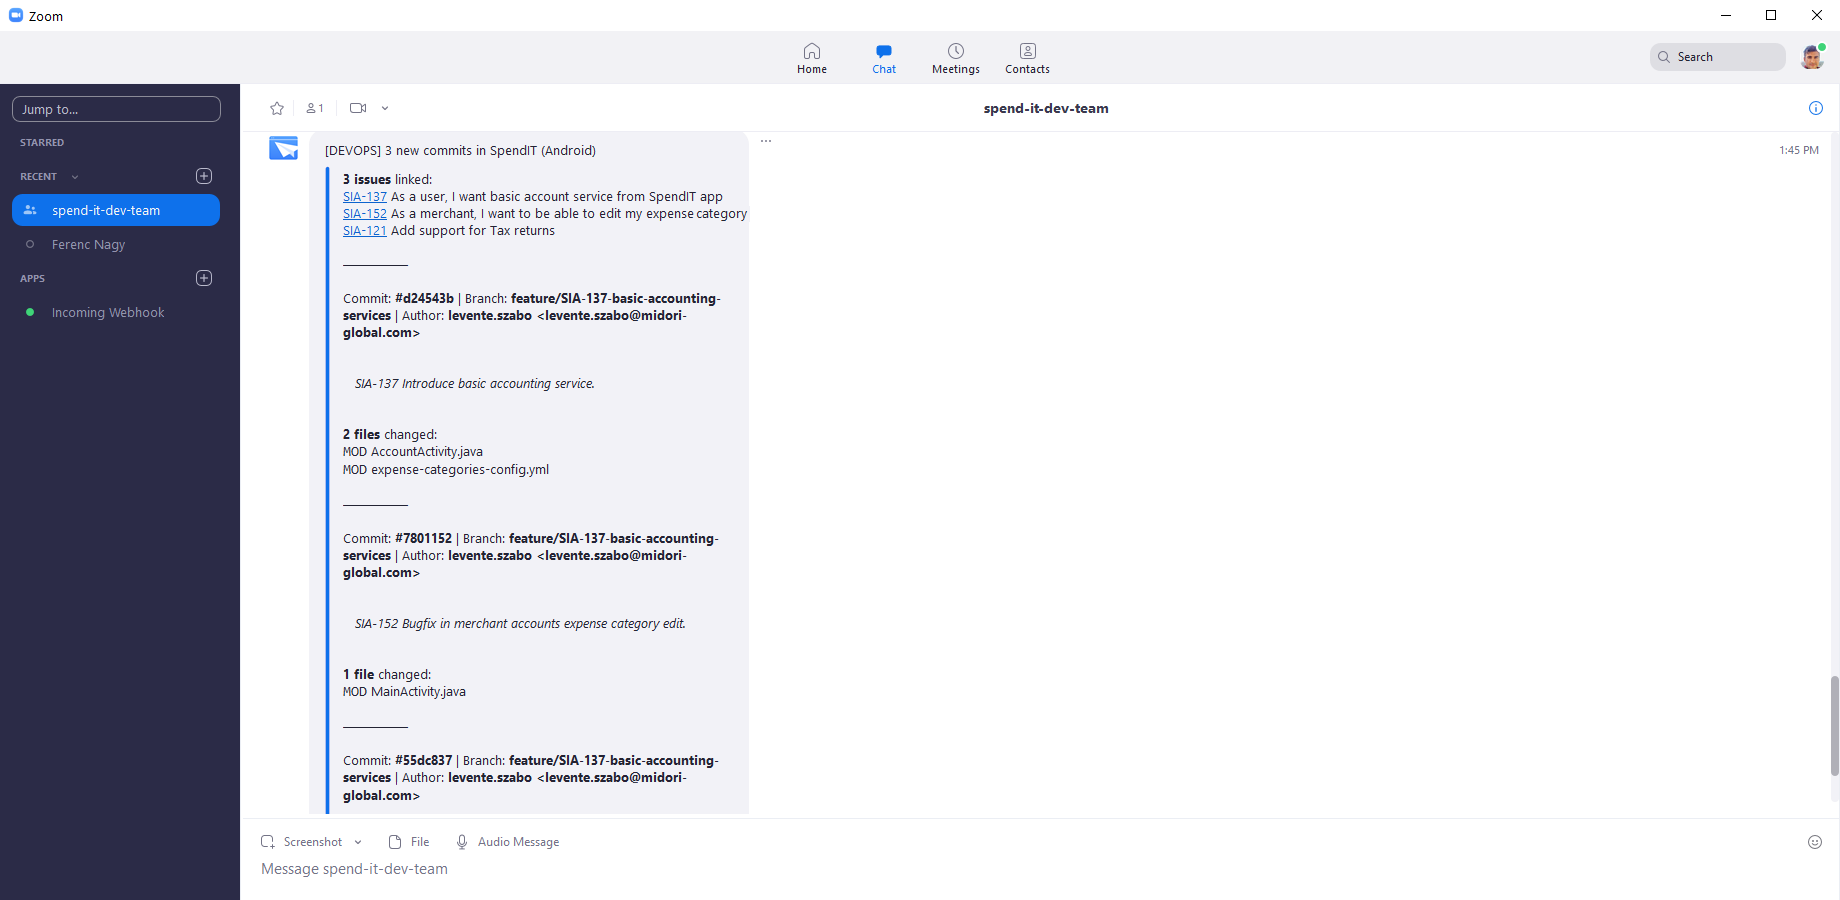
- A Zoom message will be sent to the selected chat with the linked issue list and the commit details.
Troubleshooting
If you don't get the expected results:
- See the general troubleshooting steps.
Questions?
Ask us any time.