In this page
Send Excel spreadsheets in email from a JQL query on a specified schedule
Send Excel spreadsheets in email on issue events (created, updated, commented, etc.)
How to know which Jira site and which automation rule sent an email?
How to generate Excel spreadsheets from Jira and send them in email?
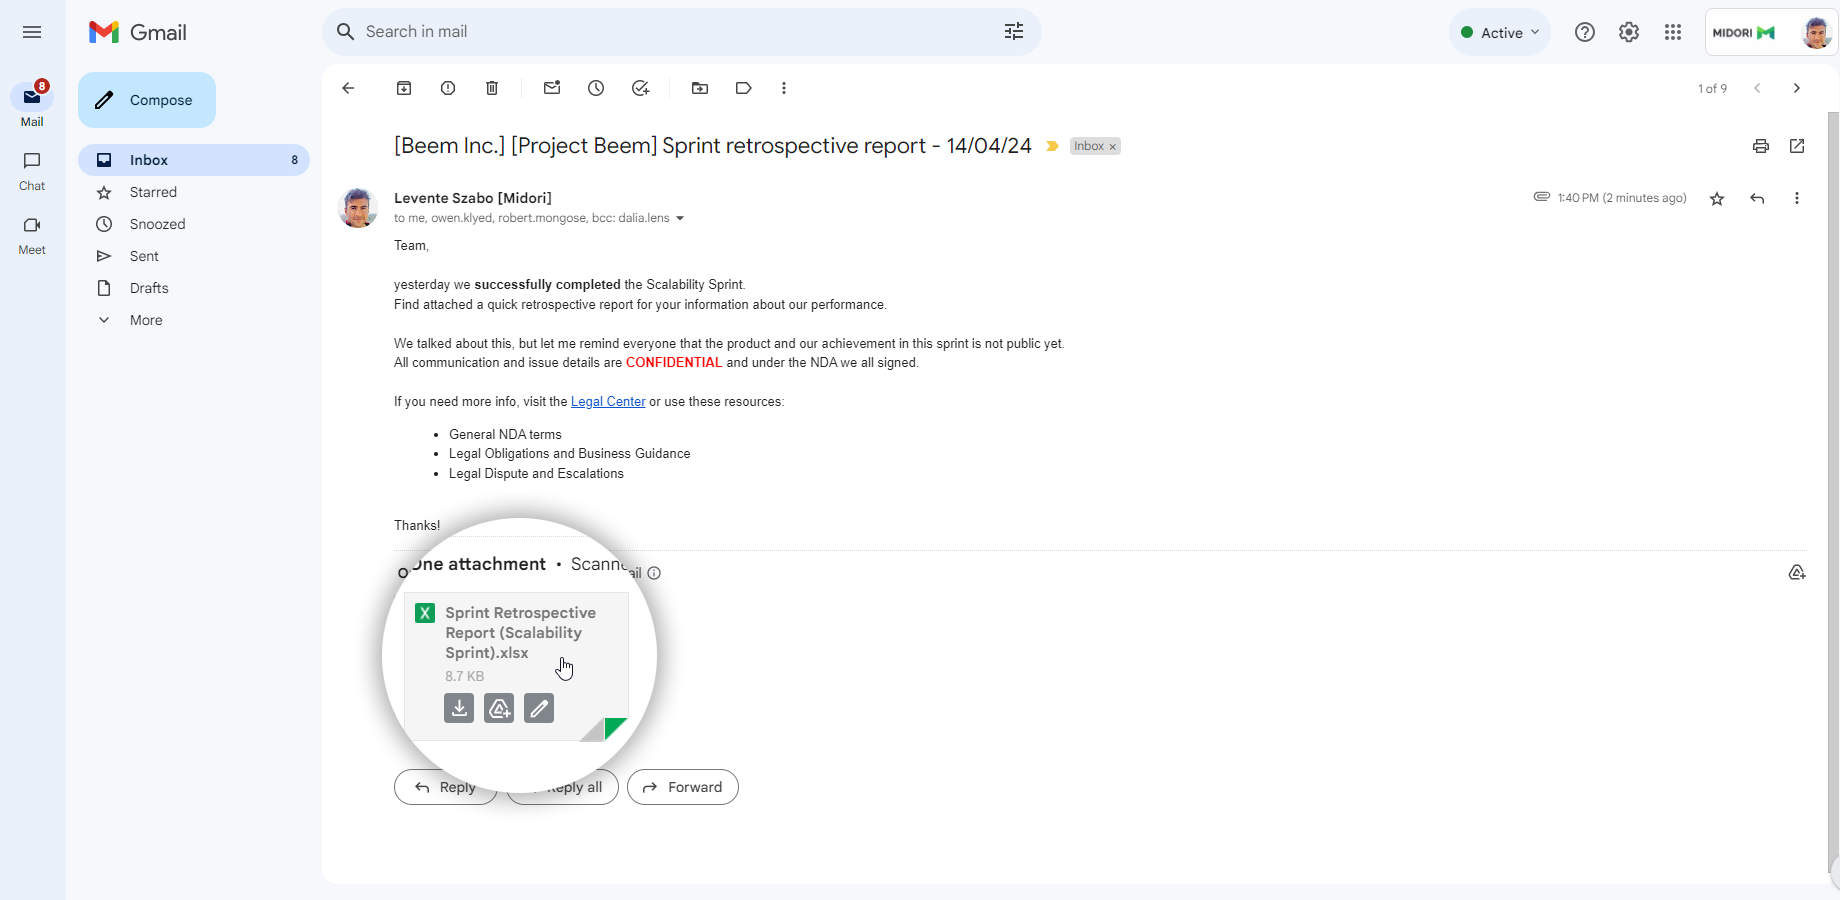
Automatically generating Excel files and sending them as email attachments to one or more recipients is an efficient way to keep your stakeholders informed about Jira issues.
You can implement this process by configuring a simple automation rule:
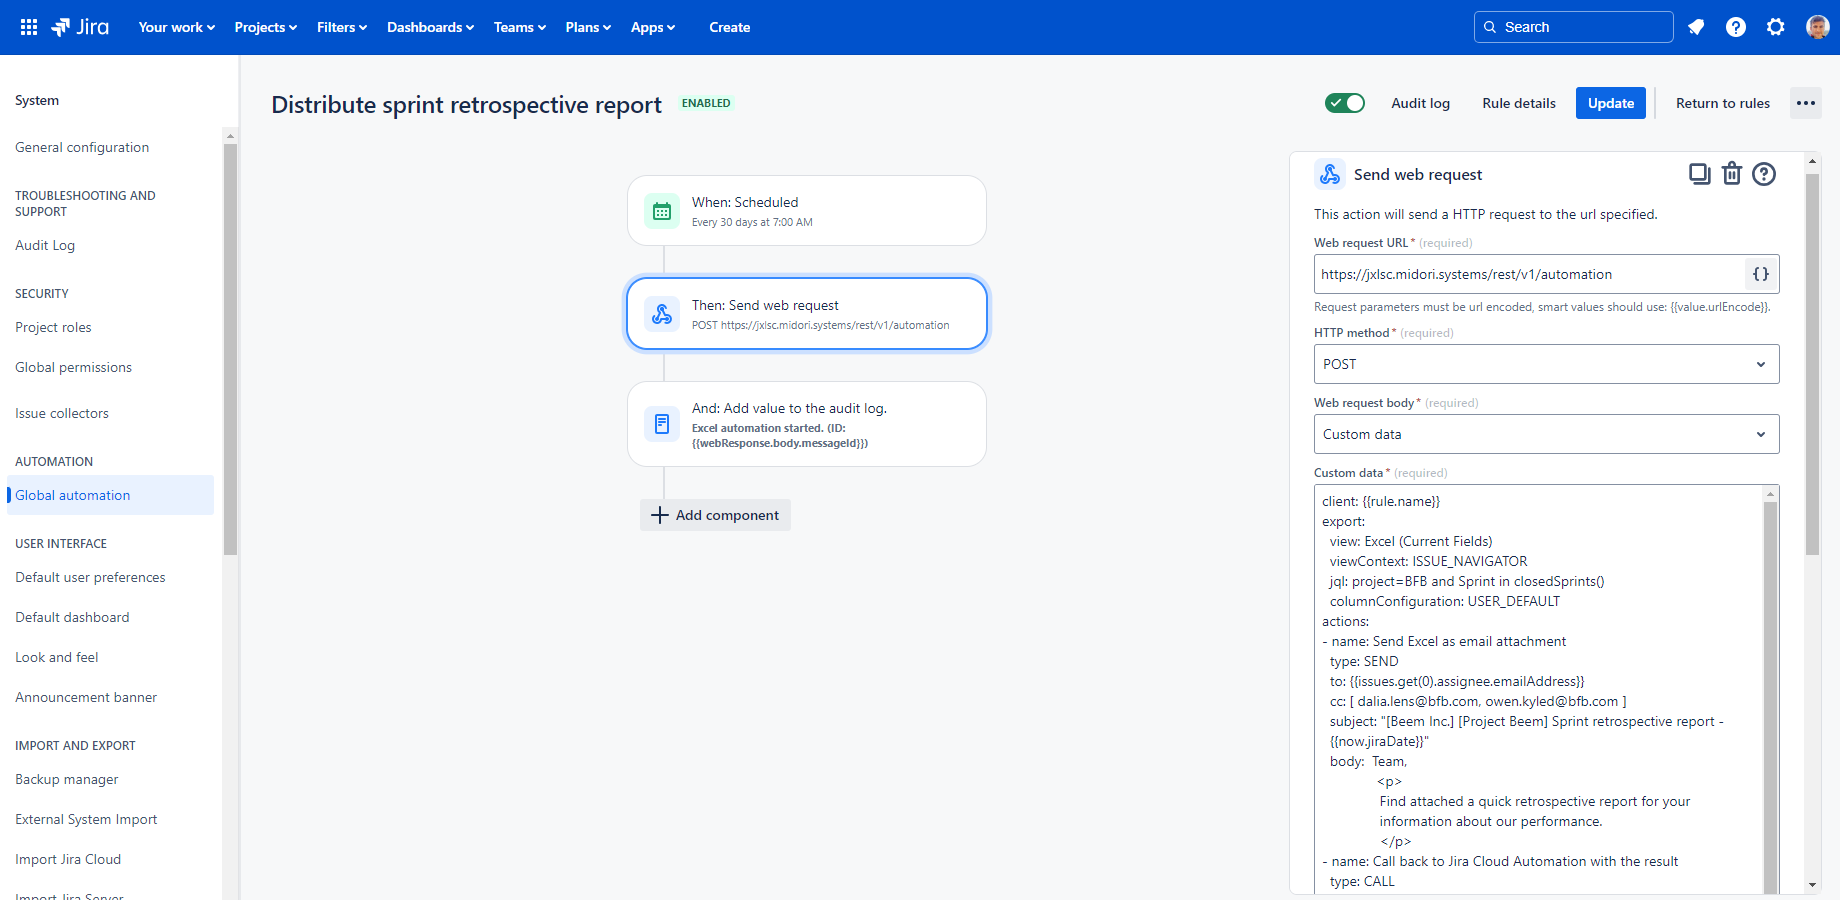
Every time the rule is executed, recipients will receive an email with the Excel file attached:
To have this in minutes, just follow the step-by-step guides in the next sections!
Notes:
- Although the guides are written specifically for the Scheduled and the Issue Event (created, updated, etc.) triggers, you can choose any other trigger!
- Although the guides are written to implement the "bare minimum" rules, you can freely add further actions or conditions for altered logic!
- The email with the Excel file attachment is sent from the "no-reply@jxlsc.midori.systems" address. This is a verified email address and cannot be changed due to security reasons.
Send Excel spreadsheets in email from a JQL query on a specified schedule
Watch this short tutorial video, then follow the detailed steps under the video:

Configuration steps:
- Login to Jira as administrator.
- Go to Settings (cog icon "⚙" in the top right) → System (under Jira settings) → Global automation (in the left-bar under Automation).
- Click Create rule.
- Select the Scheduled trigger and configure the schedule. (Do not check Run a JQL search... as the JQL query will be configured via the next action.)
- Click Next → THEN: Add an action.
-
Select the Send web request action and:
- Enter "https://jxlsc.midori.systems/rest/v1/automation" as Web request URL.
- Select POST as HTTP method.
- Select Custom data as Web request body.
-
Copy this request body template to Custom data:
client: {{rule.name}} export: view: Excel (Current Fields) viewContext: ISSUE_NAVIGATOR jql: project = FOO and created > startOfDay() # set your JQL query columnConfiguration: USER_DEFAULT actions: - name: Send Excel as email attachment type: SEND to: [ alice@acme.com, bob@acme.com, cecil@acme.com ] # set your recipients cc: [ david@acme.com ] # set or remove this line bcc: [ emily@acme.com ] # set or remove this line subject: Project FOO stand-up report on {{now.jiraDate}} # set your email subject body: >- Find the <b>Excel file</b> attached to this email.<br> # set your email body Happy reading! - name: Call back to Jira Cloud Automation type: CALL url: https://api-private.atlassian.com/automation/webhooks/jira/a/12345/abcde # set your callback rule's URL secret: 12345abcde # set your callback rule's secret -
Set the actual values for the fields marked with # set ...:
-
For the fields in the export: section:
- Open a new browser tab and generate the YAML fragment.
- Overwrite the whole export: section with the generated one.
- For the fields in the actions: section:
-
For the fields in the export: section:
- Make sure that the indentation still looks like above after your changes. (Wrong indentation will break the request body!)
- Check the Delay execution of subsequent rule actions... option. (Needed for the next action to be able to write the ID received in the response to the log.)
- Add the required request headers to Headers.
- Click Next → THEN: Add an action.
- Select the Log action (not Log work!) and copy this to Log message:
Excel automation started. (ID: {{webResponse.body.messageId}} Log command: {{webResponse.body.logCommand}}) - For self-verification, compare the rule in the editor to this screenshot. (They must contain the same components in the same layout, but identifiers can be different.)
- Click Turn on rule at the top.
- Enter "Send Excel on a specified schedule" to Rule name. (You can use any name as long as it is intuitive.)
- Click Turn on rule again → Return to rules.
- You're done!
Send Excel spreadsheets in email on issue events (created, updated, commented, etc.)
Watch this short tutorial video, then follow the detailed steps under the video:

Configuration steps:
- Login to Jira as administrator.
- Go to Settings (cog icon "⚙" in the top right) → System (under Jira settings) → Global automation (in the left-bar under Automation).
- Click Create rule.
- Select any of the Issue triggers.
- Click Next → THEN: Add an action.
-
Select the Send web request action and:
- Enter "https://jxlsc.midori.systems/rest/v1/automation" as Web request URL.
- Select POST as HTTP method.
- Select Custom data as Web request body.
-
Copy this request body template to Custom data:
client: {{rule.name}} export: view: Excel (Current Fields) viewContext: SINGLE_ISSUE_VIEW jql: key = {{issue.key}} # set your JQL query columnConfiguration: USER_DEFAULT actions: - name: Send Excel as email attachment type: SEND to: [ alice@acme.com, bob@acme.com, cecil@acme.com ] # set your recipients cc: [ david@acme.com ] # set or remove this line bcc: [ emily@acme.com ] # set or remove this line subject: Project FOO stand-up report on {{now.jiraDate}} # set your email subject body: >- Find the <b>Excel file</b> attached to this email.<br> # set your email body Happy reading! - name: Call back to Jira Cloud Automation type: CALL url: https://api-private.atlassian.com/automation/webhooks/jira/a/12345/abcde # set your callback rule's URL secret: 12345abcde # set your callback rule's secret -
Set the actual values for the fields marked with # set ...:
-
For the fields in the export: section:
- Open a new browser tab and generate the YAML fragment.
- Overwrite the whole export: section with the generated one.
- For the fields in the actions: section:
-
For the fields in the export: section:
- Make sure that the indentation still looks like above after your changes. (Wrong indentation will break the request body!)
- Check the Delay execution of subsequent rule actions... option. (Needed for the next action to be able to write the ID received in the response to the log.)
- Add the required request headers to Headers.
- Click Next → THEN: Add an action.
- Select the Log action (not Log work!) and copy this to Log message:
Excel automation started. (ID: {{webResponse.body.messageId}} Log command: {{webResponse.body.logCommand}}) - Click Turn on rule at the top.
- Enter "Send Excel on issue event" to Rule name. (You can use any name as long as it is intuitive.)
- Click Turn on rule again → Return to rules.
- You're done!
How to know which Jira site and which automation rule sent an email?
If you use multiple Jira sites, or you have multiple automation rules to send emails, or you received an unexpected email, it can be useful to identify the sender. To help with this, each email sent by the app contains the following custom email header fields.
| Header field name | Value (example) | Description |
|---|---|---|
| X-Midori-Base-Url | https://mysite.atlassian.net | The base URL of the Jira Cloud site on which the automation rule which sent this email was executed. |
| X-Midori-Client | Every morning, email the task list | The name of the automation rule which sent this email. (It is essentially the value of the client field from the automation request body.) |
Questions?
Ask us any time.