In this page
Content statuses and content status schemes
View the content status schemes
Alternative ways to access the scheme list
Factory default schemes
Reset schemes to default
Configure a content status scheme
Step 1: Select content statuses
Step 2: Define ordering for content statuses
Step 3: Specify CQL conditions
A few words on CQL expressions
Delete a content status scheme
View the content status scheme of a space
Content status schemes
Content status schemes are the most important part of your content lifecycle management strategy. They define how and when content statuses are assigned to the pages and blog posts in your spaces.
Content statuses and content status schemes
Content status schemes are named, ordered sets of content statuses. Each status is paired up with a custom CQL (Confluence Query Language) expression to specify which contents should the status be applied to. You may create a scheme specifically for a space, or you can reuse a scheme for multiple spaces.
A content status scheme consists of:
- a name
- a description
-
content statuses, each — except the last, default one — having:
- a CQL expression
- an optional recursive CQL expression
You need to choose the CQL expressions carefully and the ordering of statuses is also very important. More on these later.
View the content status schemes
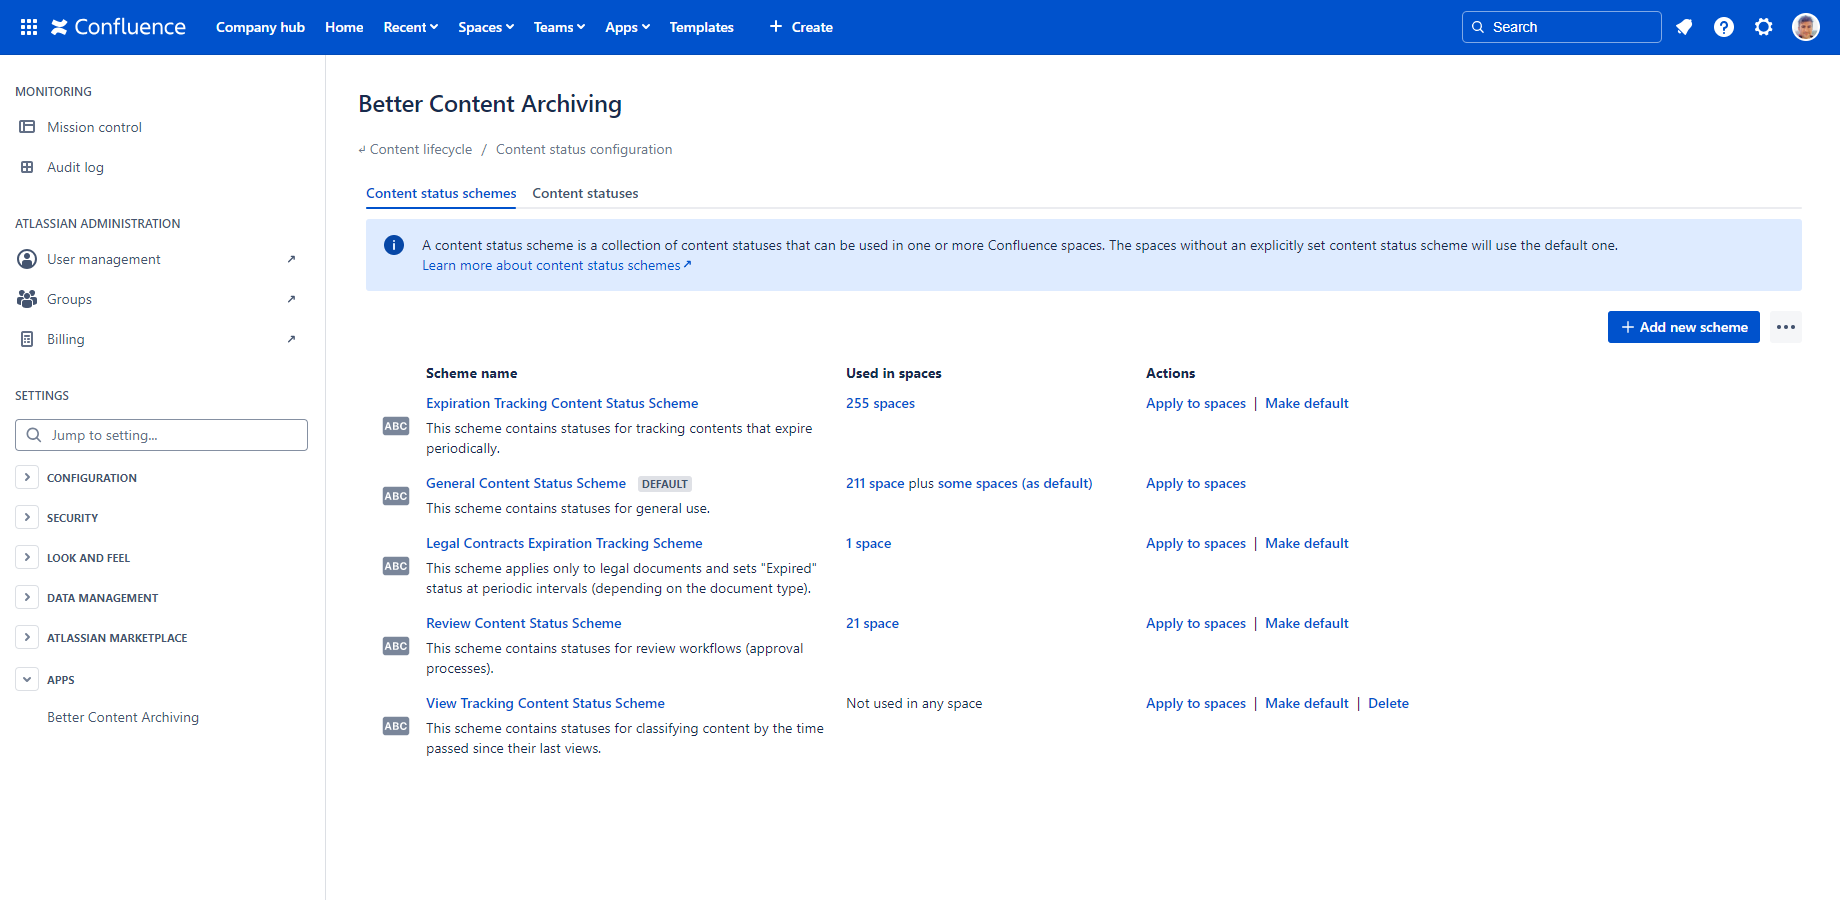
To configure content status schemes, navigate to Confluence Settings (cog icon "⚙" in the top right) → Apps → Better Content Archiving → Configuration → Content status configuration.
The content status scheme list is just like any other scheme list. If you are not familiar with scheme lists and the basics of schemes, refer to general configuration for more information.
The Content status schemes tab is selected by default. The list of currently defined content status schemes is shown.
Alternative ways to access the scheme list
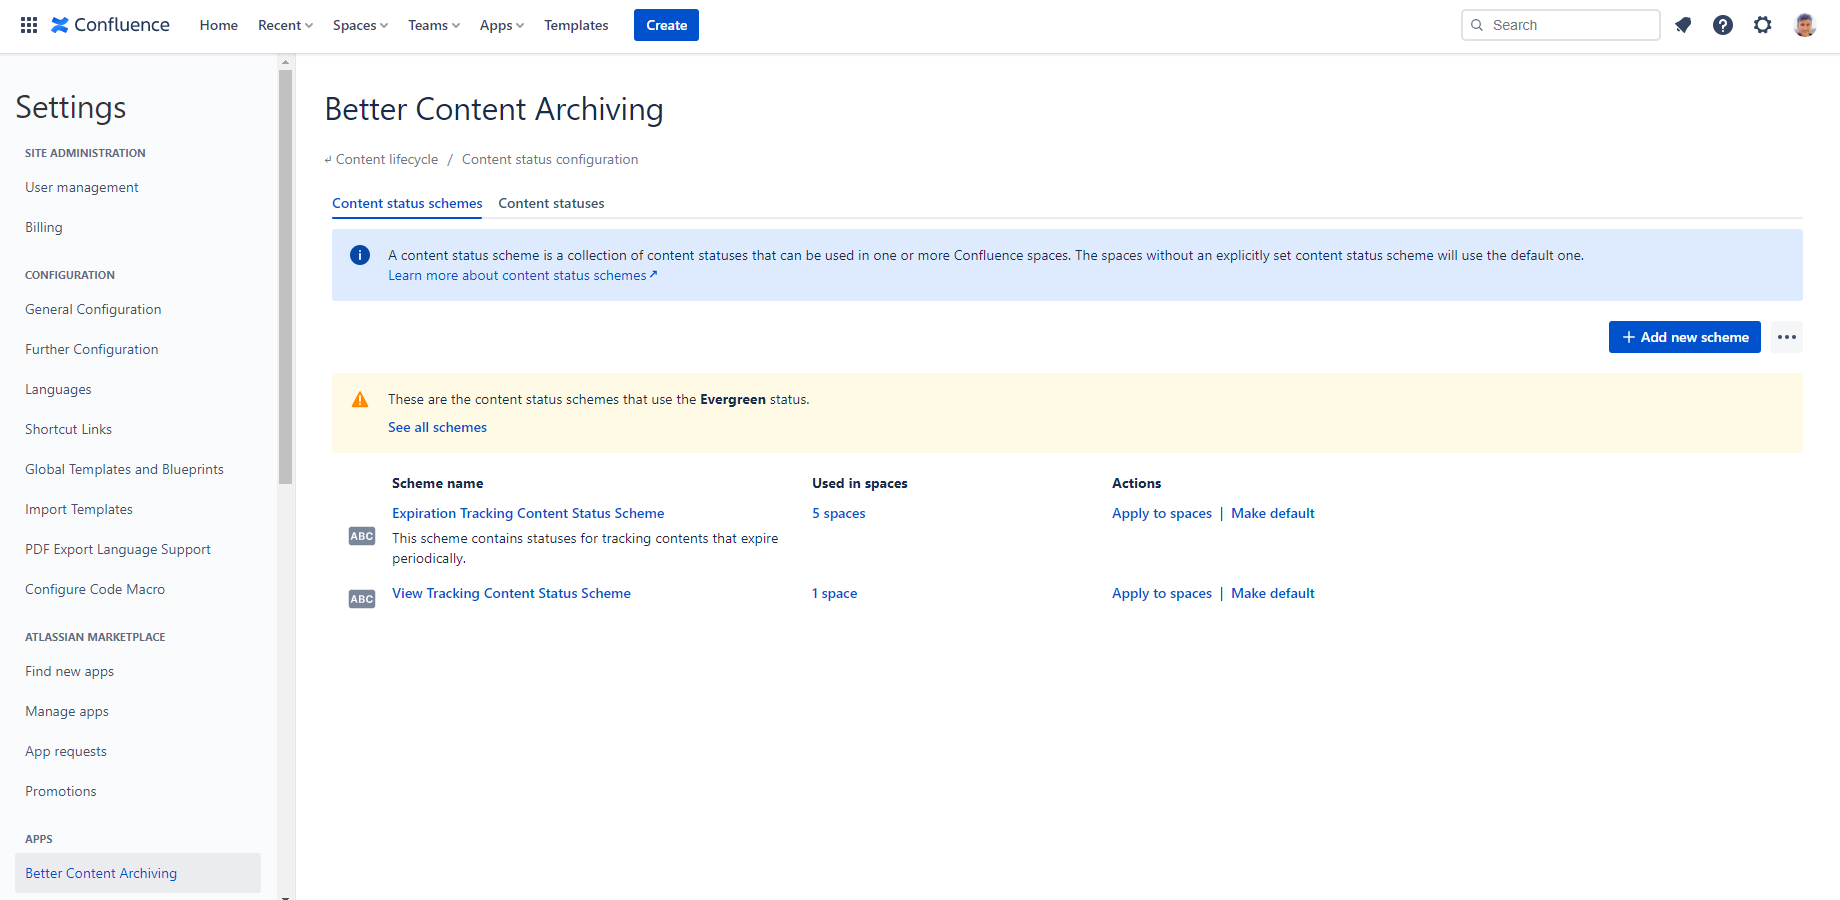
This list can also be accessed by clicking the Used in schemes link in the Content statuses list. In this case, the list is filtered on the content status selected.
For Confluence administrators, the content status scheme list is also visible from any space under Space Settings → Integrations → Better Content Archiving. On the Content status scheme tab, click Choose a new scheme and then in the modal, click Manage schemes. Changes made there have the exact same effect as if they were made under Confluence Settings (cog icon "⚙" in the top right) → Apps → Better Content Archiving → Configuration → Content status configuration.
Factory default schemes
Better Content Archiving comes with a set of factory default content status schemes. One of them is the "General Content Status Scheme" which is set as default to your spaces.
Reset schemes to default
You can create new schemes, modify them, delete them, and you can also reset schemes to their factory default state. When doing so, you lose all content statuses and content status schemes that you created or customized. There is no undo, so be careful.
Configure a content status scheme
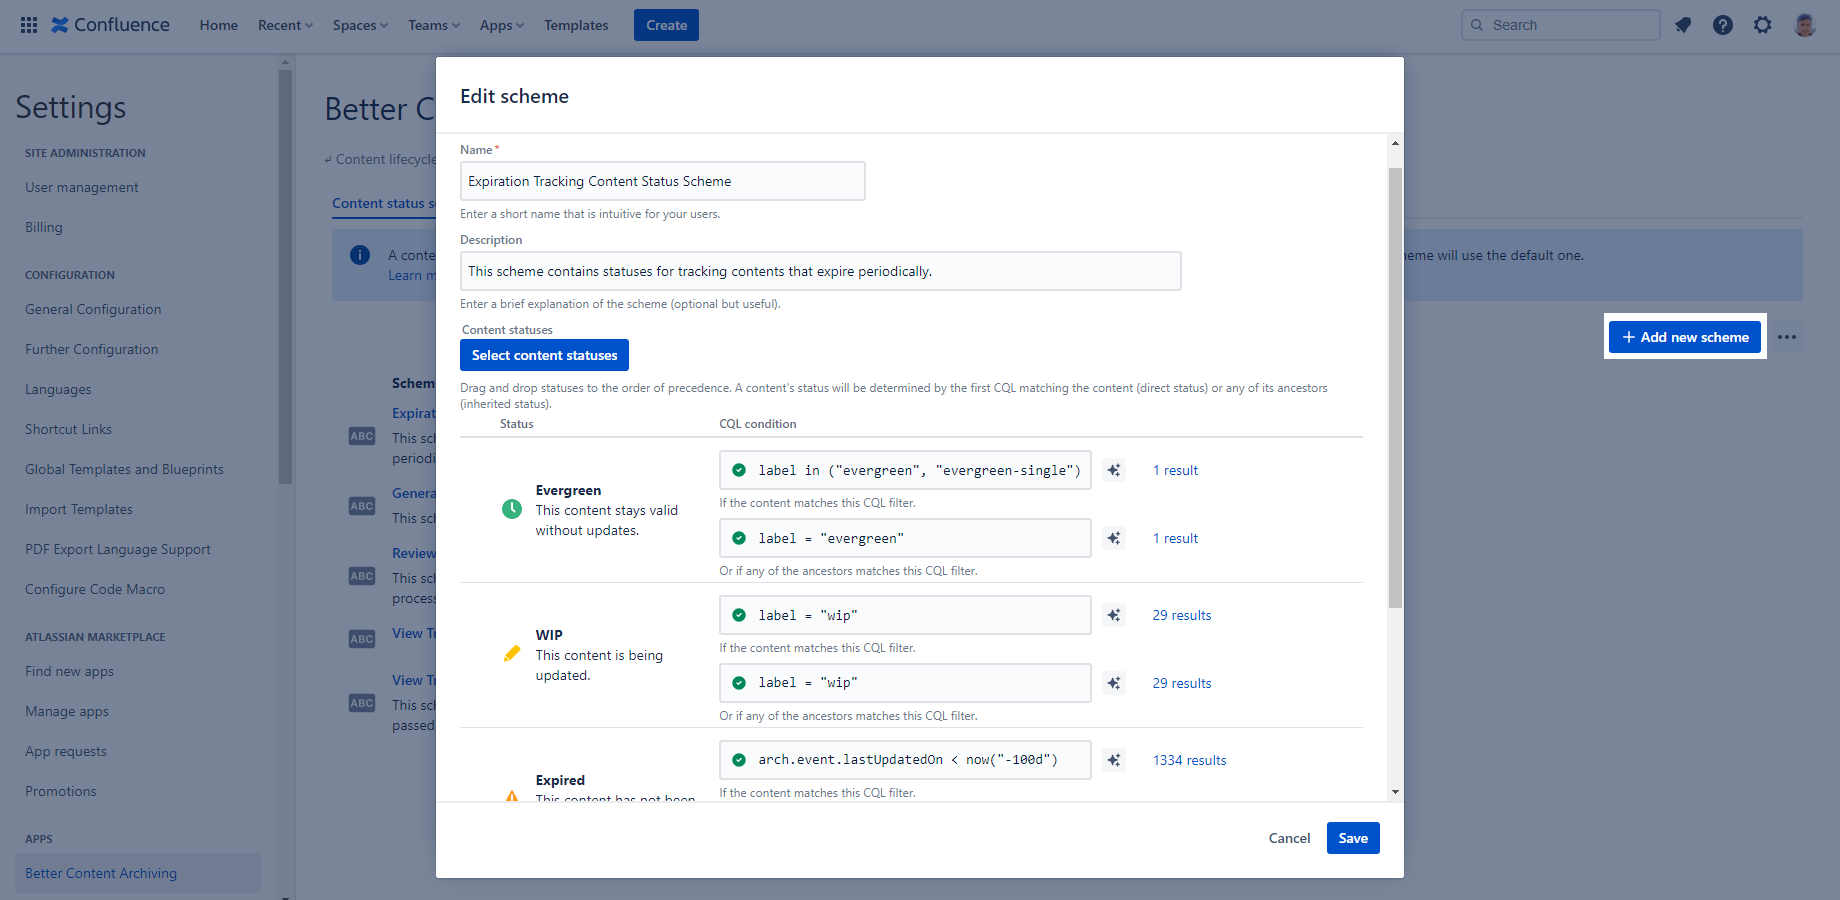
To create a new content status scheme, click the Add new scheme button on the right above the content status scheme list. To edit an existing one, click the name of a scheme.
The editor modal dialog is opened.
Set the name of the scheme, and add an optional description, then specify the content status assignment rules. In the following sections, each step is described in detail.
Note: if you edit a content status scheme, you may need to run the Refresh content statuses job on the spaces to which that content status scheme is assigned. You are reminded of this by the Content statuses invalid flag.
This flag is also shown if you change the content status scheme of a space under Space Settings → Integrations → Better Content Archiving → Content status scheme. Refer to Jobs for more information on running the Refresh content statuses job.
Step 1: Select content statuses
You have to select at least 1, but no more than 10 content statuses to be added to the scheme. Click the Select content statuses button to do this.
Select the content statuses you want to add to the scheme and click OK.
If you remove a content status, you will be asked for confirmation, because you will lose the custom CQL condition specified to the status.
Step 2: Define ordering for content statuses
The order of content statuses is very important. For each page and blog post, the app will try the CQL expressions one by one, from top to bottom to see if any of them matches that particular content. A content's status will be determined by the CQL that first matches the content (direct status) or any of its ancestors (inherited status). If either a direct or an inherited CQL matches the content, the process stops.
The content status at the bottom is the default content status of the scheme, so it does not allow you to specify CQL conditions. This status is essentially a "fallback". It is applied to all contents that do not match any of the CQL expressions defined in the scheme.
Drag and drop the content statuses in the list to reorder them.
Step 3: Specify CQL conditions
As you already know, CQL queries of a content status scheme are evaluated from top to bottom, one by one until a match is found. It is important that a CQL query defines a "looser" condition than the one before as the evaluation process goes down the status list. Otherwise, a loose CQL condition that comes first would always override a strict CQL condition that comes later.
For each content status added to the scheme, you can see two fields:
- the CQL field, which is required for all content statuses except for the last one
- the recursive CQL field, which is optional
A recursive CQL is tested against each descendant but not the page itself.
A few words on CQL expressions
When constructing your CQL query, you can use CQL fields that are provided by the Better Content Archiving app.
To the right of the CQL expression input box, the CQL fields have an Examples button and a Results button.
The Examples button opens the CQL examples popup which contains a few suggested CQL expression samples. Click a sample query to copy to the CQL field.
The Results button displays the number of contents returned by the CQL query. Click it to open the Results popup. In this popup, you can see the first 10 results. This can be useful to quickly verify that your CQL expression returns the contents you intend to see.
Note: there are some limitations to the CQL expressions that you can use in content status schemes.
- You may not search for users (using type="user" or a similar condition). Content status schemes are applied to pages and blog posts only.
- You may not use ordering (ORDER BY title, for example). Results will be ordered by title implicitly.
Delete a content status scheme
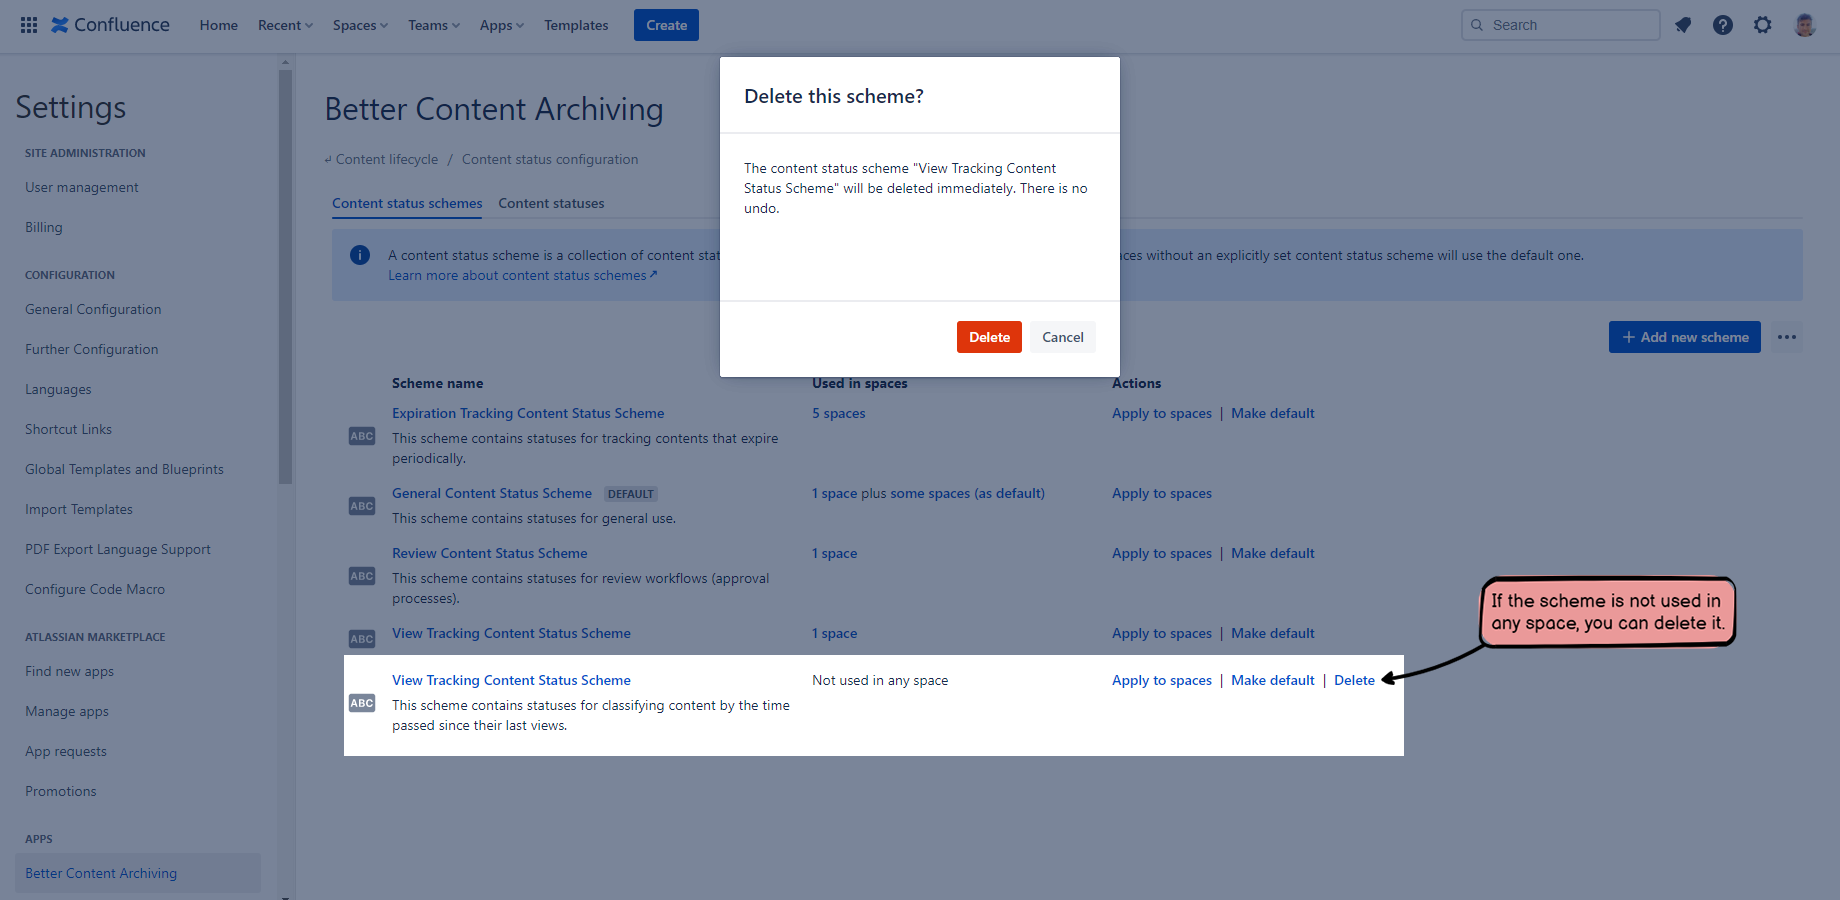
If the content status scheme is not used in any space, and it is also not the default one, you can permanently delete it with the Delete button next to the content status scheme.
Scheme usage is shown in the Used in spaces column. Refer to general configuration for more details on this.
View the content status scheme of a space
With Confluence administrator or Space administrator privileges, you can view the details of the content status scheme assigned to a space under Space Settings.
Open the space, click Space Settings → Integrations → Better Content Archiving. Select the Content status scheme tab. You can see the read-only view of the content status scheme that is assigned to this space.
Refer to the general configuration for more information on scheme management under Space Settings.
Questions?
Ask us any time.


